Xcode on Windows with Virtualization – Today I will share one of the most popular tutorials, which is requested by our readers. Therefore, we have created this tutorial, which will help you to Download & Install the xCode on Windows using Virtualization / Virtualbox / Vmware. So, learn How Download Xcode for Windows and How to Install Xcode for Windows Download 10, 8, and 7.
Xcode on Windows with Virtualization / Virtualbox / Vmware
Contents
Step By Step Installing Xcode using Virtual Box
We have created an easy and simple step-by-step tutorial for you after Xcode for windows, which will help you to follow and work. However, if you still face any type of problem you can post your problem as a comment here. We would love to resolve it. So, let’s start learning How to Install Xcode on Windows, How to Download Xcode for Windows, and Xcode for Windows 10 – 8 – 7.
Install Virtualbox
Step – 1: First of all, you should install Virtualbox. Virtual Box shows your Windows screen like Apple. After installing Virtualbox, you can see the Logo of Virtualbox on the screen.

Virtualbox Setup
Step – 2: Now click on Virtualbox as you can see in the first step. After the open Virtualbox select OS X Mountain Lion and finally click on Show as you can see the below Image.

App Store
Step – 3: Now you can see your screen like an Apple screen, So, now you can click on App Store. Now you have an Apple screen you can get the benefit of Apple using Windows.

Search on App Store “Xcode”
Step – 4: After the open App Store, you can see the right position search box. Now search Xcode in the search box.

Install Xcode
Step – 5: Now you can install Xcode and enter Apple ID and Password as you can see in the below image.

Xcode Downloading
Step – 6: Wait some moment for Downloading Xcode for Windows.

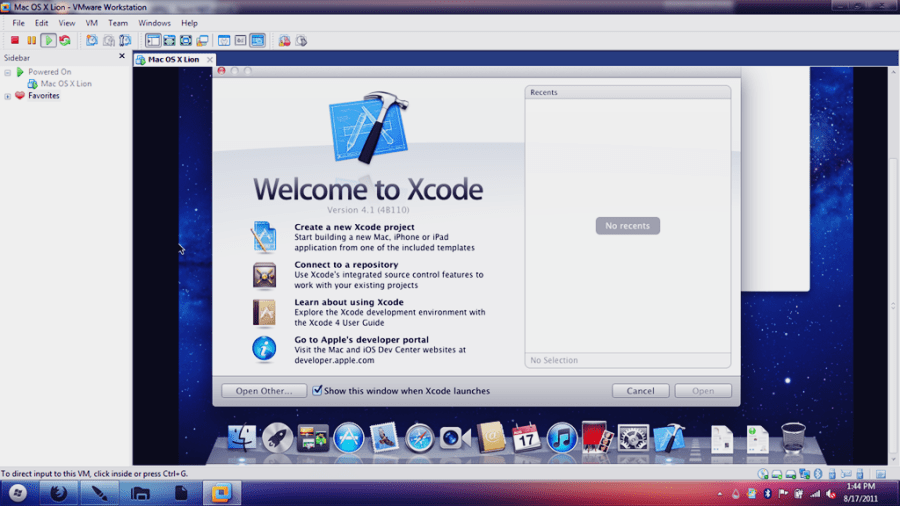
Xcode for Windows
Step – 7: Now you can see the on-screen Xcode App. Click on it.

Xcode for Windows Download
Step – 8: After installing Xcode App click on it and Agree on the License Agreement clicking by Agree as you can see in the below image.

Xcode Username Password
Step – 9: Now enter the Username and Password as you can see in this below image. Do this work carefully and don’t share this information with anyone.

Xcode Installation Complete
Step – 10: Now you can see on your screen the word “Xcode Installation Complete”.

Xcode for Windows Using Start
Step – 11: Now you can able to use Xcode for Windows on your Windows Laptop or Computer as Apple.

So that’s it! now your Xcode is in windows and you can simply use it for your coding now need to purchase the Apple system. Lol!
You can buy it when you have enough money. As of now, your windows system is perfect for your Xcode!
So, as above you can learn How to Install Download Xcode for Windows – How to set up Xcode step by step. After using this method you feel like you are using Apple MAC.
So, If you learn from it then, share with this article who needs this stuff. Also, bookmark this blog for the upcoming articles and more updates. That’s why, whenever we will update our article then you can benefit from it.
Related Tags – Xcode on Windows 10, Xcode in Windows, XCode 7 for Windows, Xcode on Windows with Virtualization, Xcode on Windows